Ever wondered why some paved areas look immaculate all year round, while others seem to struggle with weeds and insects? In this article we discuss how to lay concrete pavers on sand and share some tips and tricks to ensure you get the best possible result out of your next project.
Choosing the perfect pavers for your outdoor area is hard enough – let alone having to calculate how much levelling sand is required and whether a self hardening or polymeric sand is worth the extra investment. It’s easy to take short cuts, but the downside is that you will be spending way too much of your precious time making up for it in the years to come.
Bedding – making sure your pavers remain stable
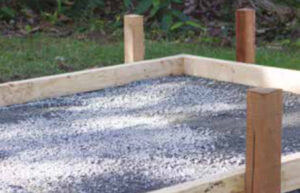
Level out any uneven areas where you are planning to pave and spread road base or crusher dust at a thickness of 10-15cm over the ground surface. You may need to construct a low frame to ensure the bedding area stays contained. Compact the road base so that it is as even as possible.
Bedding sand
Make sure you have a good firm base to place your pavers on. This means your pavers will not subside and become uneven over time. Erosion from wet weather and sand settling can result in pavers becoming uneven over time. You don’t want to find yourself having to reseat pavers further down the track.
How much sand is needed for pavers
To achieve a firm base from the beginning, you need to make sure you have the correct depth of sand under pavers. We recommend allowing for a depth of at least 30mm loose sand. This will pack down to about 20-25mm depending on the method you use for packing and will allow for drainage without your pavers shifting. A coarse graded sand such as Easy Mix Paver Bedding & Screeding Sand is ideal as the particle sizes will allow you to slide your pavers into position easily while you are bedding them.
Two 20kg bags will cover an area of approximately 1 square metre at a depth of 30mm. Using this as a guide, you can calculate how much sand for pavers will be needed for your project.
The importance of packing your bedding sand
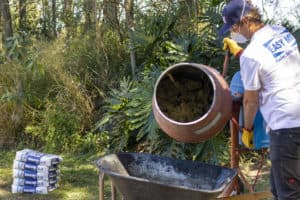
It is essential to pack sand for pavers and choose a method that is suitable for the size of your project. If your project is large, a vibrating compactor is a great choice. Hiring one from your local Bunnings will prove to be a major time saver and an excellent investment. You will need to use it more than once in your project. Vibrating will ensure that the sand bed is tight and firm. Simply rolling over it with a weight or walking over it, will not guarantee that the sand settles into every crevice.
Failure to pack bedding sand has been the downfall of many a DIY paving project! Without a firm bed, your pavers are likely to shift – either rising or dipping and will result in a somewhat messy look.
Handy bedding sand levelling tips:
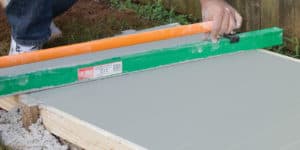
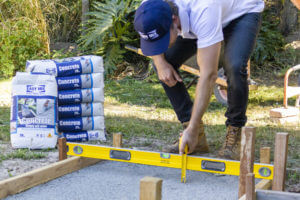
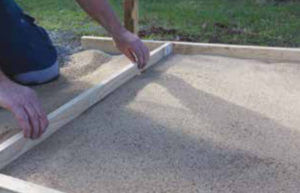
Spread the bedding sand over the area you wish to pave using a shovel and drag a straight timber edge across the top to level it out. Use a ruler or piece of dowel with a 30mm marking on it to check that the depth is at least 30mm throughout. A spirit level and plumbline will assist in making sure that the surface is at the correct height.
Pattern and layout of pavers
Once you have chosen your pavers you will need to decide on a layout pattern. There are a wonderful assortment of patterns to choose from. We recommend reading this excellent article about 10 tile patterns you need to know before you make your decision.
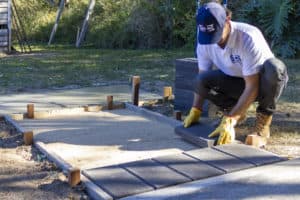
Once you choose a pattern, you will need to map out how you will lay your pavers. Using string lines to create a guide will make laying your pavers accurately, much easier and ensure that your pattern remains the same throughout. There will always be that one visitor who will thoroughly enjoy pointing out the subtle shift in the angle of your pavers as you approached the end of your project.
Using a string line to help position pavers
Laying the pavers
This may seem like a challenge, but with stringlines, a nice smooth and compact surface and a clear head, it will quickly become a rhythm and straight forward. It is important to make sure you lay the whole pavers first. Start by laying the pavers along the longest edge of the entire area. Aim to leave even an even gap of between 3-5mm between each paver.

Once the whole pavers are in place, measure and mark up the sizes of the remaining pavers and cut them to size and place them. This video shows you several different methods for cutting pavers. Keep checking that your pavers are level as you go. Use a rubber mallet to tap them into position, and a spirit level or piece of timber to ensure you have an even surface.
Filling between pavers
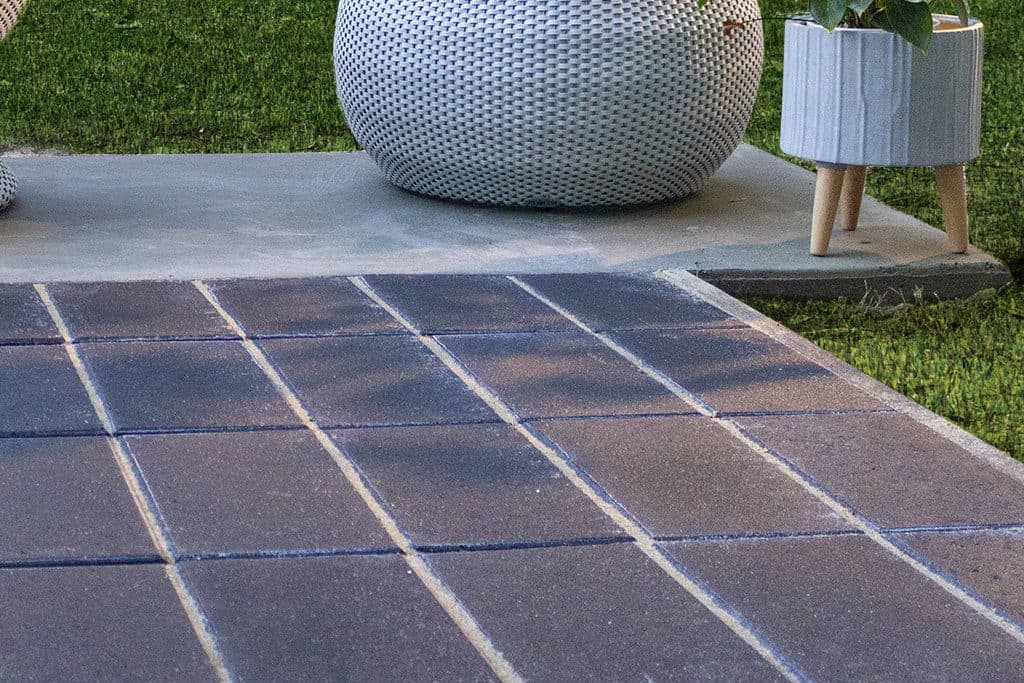
This is the finishing touch that can make or break your project. If you don’t want to spend your weekends weeding and squirting insecticides between your pavers, Easy Mix Paver Bond is the perfect solution as it is a self hardening sand. Special additives in this sand coalesce to form a tight bond between pavers that is extremely difficult for ants and weeds to penetrate. Filling between pavers serves two functions. In addition to deterring weeds and insects, it also holds pavers in position. A good specialty sand with additives like Paver Bond has the flexibility to allow for a small amount of movement without cracking in addition to locking pavers into place.
This is how to calculate the amount of sand needed for pavers. One 20kg bag of Paver Bond will provide filling for approximately 5 to 7m2of. This will vary depending on the size of your pavers. Smaller pavers will have more gaps and therefore require more rather than less.

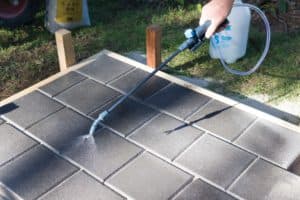
Pour Paver Bond sand between the pavers and use a broom to sweep any excess into the gaps when you are finished. Now is the time to make the most of your vibrating compactor again and run it over the paved surface. This time, you will be checking to make sure the filling sand has settled and fills all the gaps up to the top. Top up any gaps that form with more sand. When you are satisfied that all the gaps have been filled, sweep away the excess.

Use a water pump pack or hose on a fine mist setting to lightly moisten between the joints. This will activate the additives in the Paver Bond and lock your pavers into position. You will need to use enough water to fully seep into the joints, but do not drench the sand to the point where it washes away. Try to avoid walking over until the surface for the next 24 hours until the sand has completely set.
That’s it – mission accomplished! You can now sit back, enjoy your beautiful work and know that your pavers will be the be the envy of all your friends and family!