Taking the mystery out of flooring preparation
Ever wondered what floor screed is used for? You wouldn’t be the first! Floor screed is one of those trade secrets that doesn’t seem to receive nearly as much attention as it should.
Fundamentally, it is a mixture of cement and sand – but not just any old cement and sand. A smooth, firm, blend that holds its form. Unlike concrete, which tends to allow gravity to do the majority of its levelling, screed can be trowelled to accommodate the ‘fall’ which allows water to drain correctly in wet areas. A well designed ‘fall’ has saved the day many times – ask any carpet…
In addition to creating a ‘fall’, screed can also assist when there are several different flooring products being used by allowing for variation in material thickness. Flooring screed ensures a continuous, level floor, making it easier on unsuspecting feet.
Traditional floor screed is not designed to be used as a final flooring system. It generally doesn’t have a tough enough surface to resist the scratching and superficial wear and tear a floor is subjected to. It is, however, an important stage when preparing an existing floor for tiles, stone, carpet, timber, vinyl etc. A 10mm thick layer of screed will remove uneven surfaces, cracks and hills, making the application of your choice of flooring smooth and painless. This is particularly important when laying anything hard and unforgiving such as tiles or stone. There is nothing more frustrating than one or two tiles that jut up ever so slightly due to dips in the floor.
So how do you use floor screed?
Screeding is fairly simple to do. You just need a few basic tools, some patience and an eye for continuity. It also helps to have good knees, but we suggest if your knees don’t like the idea of screeding, they most definitely shouldn’t be flooring either!
You will need to calculate how many bags of Easy Mix Traditional Floor Screed will cover the area you are screeding. Each bag covers approximately one square metre with 10mm thick screed.
You also need the following:
- A suitable waterproofing product for wet areas
- Easy Mix Prime & Bind
- A large container or bucket (at least 20 litres is best)
- Drill with a mixing attachment
- Water and measuring jug
- Float or trowel
- Spirit level
- Roller or paint brush
- Gloves, eye protection and dust mask
Preparation
If you are flooring a wet area such as a bathroom, kitchen or laundry, it is important to ensure that it is completely waterproofed. You don’t want to risk water leaking through and causing long term damage. Make sure the entire area is completely clean – sweep, vacuum and wipe down before you commence waterproofing. Your hardware store will have a range of suitable waterproofing products to choose from. Here is a great video that explains how to waterproof a bathroom floor
If you are flooring an area that won’t be exposed to water such as a bedroom, you won’t need to waterproof it, but you should still prime the area to ensure the screed grips well. Use a roller or brush to apply a thin layer of Prime & Bind, making sure that it is absorbed into the substrate. Make sure you follow the instructions carefully.
Screeding
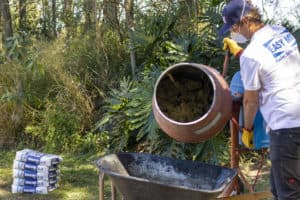
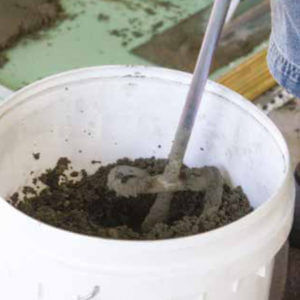
Pour as much Easy Mix Traditional Floor Screed into your mixing bucket as you feel you can comfortably mix in one go.
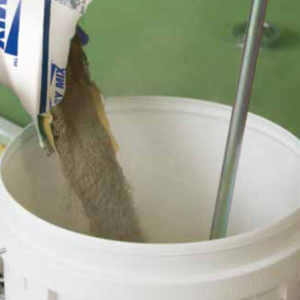
Mix 1 part water to 1 part Prime & Bind. Add 2 litres of the combined liquid per 20kg of screed and use your drill mixer on low speed to blend until it is smooth.
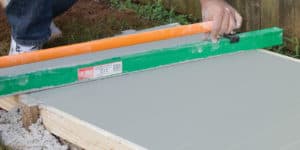
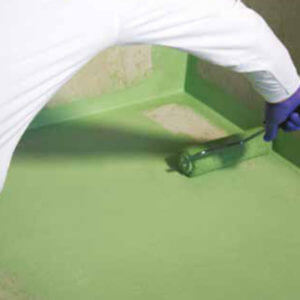
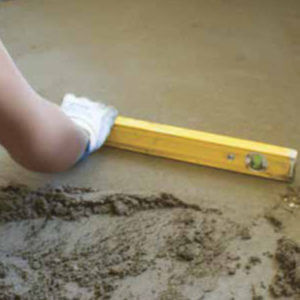
Tip the mixture into the area you are screeding, and level out to a thickness of approximately 10mm. A long, straight edge like a spirit level is great for doing this. If you are preparing a shower recess for the first time, this video shows a handy way to incorporate a drainage fall.
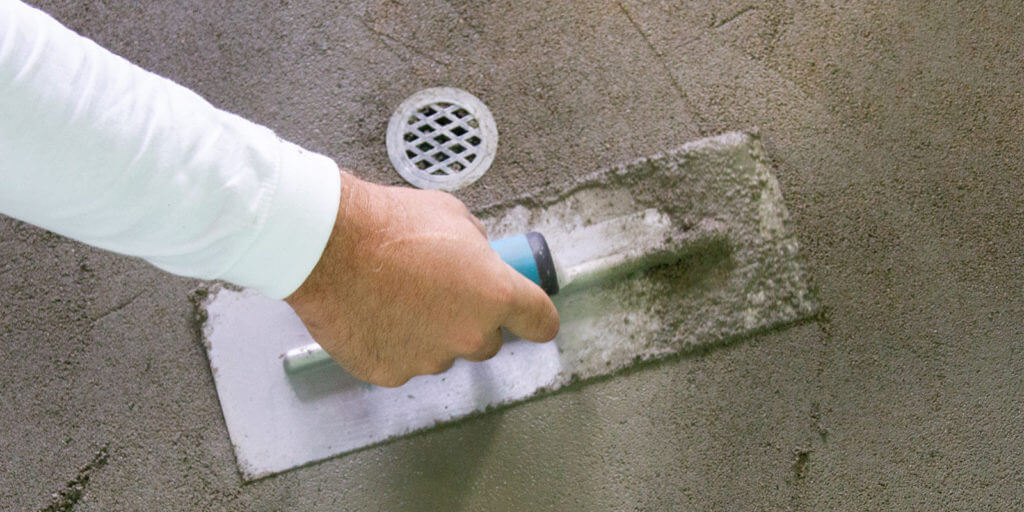
Use a float or trowel to fine tune the surface and make sure it is as smooth and even as possible. Remember – the point of applying a screed is to create a beautiful, smooth base.
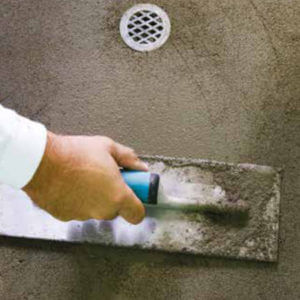
Once you have finished, leave it for at least a week to cure. Your screed will reach its maximum strength after 28 days, but we can’t all wait that long! Your screed will be firm after 24 hours, but don’t let that fool you. It will still have plenty of moisture in it, so it is best to wait for 7 days.
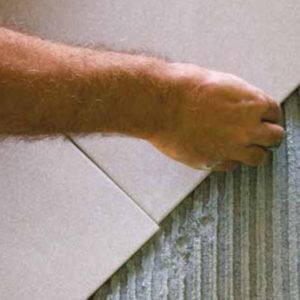
Once cured, you can dive in and apply underlay or tile adhesive and lay your brand new, level flooring.
Job done and dusted!
Download How to Lay Under Tile Screed Information Sheet